Brand loyalists and heavy buyers get their name from the fact that they spend more money and time with your brand. So, it’s only natural that you should attempt to keep them around and happy as much as possible to maintain current sales levels.
As the upselling and cross-selling pools start drying out for loyal customers, it’s best to turn to a more “feel special” approach—a VIP program that enables you to continuously reward your loyal customers.
Assuming you’ve already set up your VIP program through Froonze, it’s time to use our VIP automatic tagging feature to create customer segments, reward those segments with ongoing discounts, and increase your sales and profit.
Enable VIP auto-tagging in the Froonze loyalty app
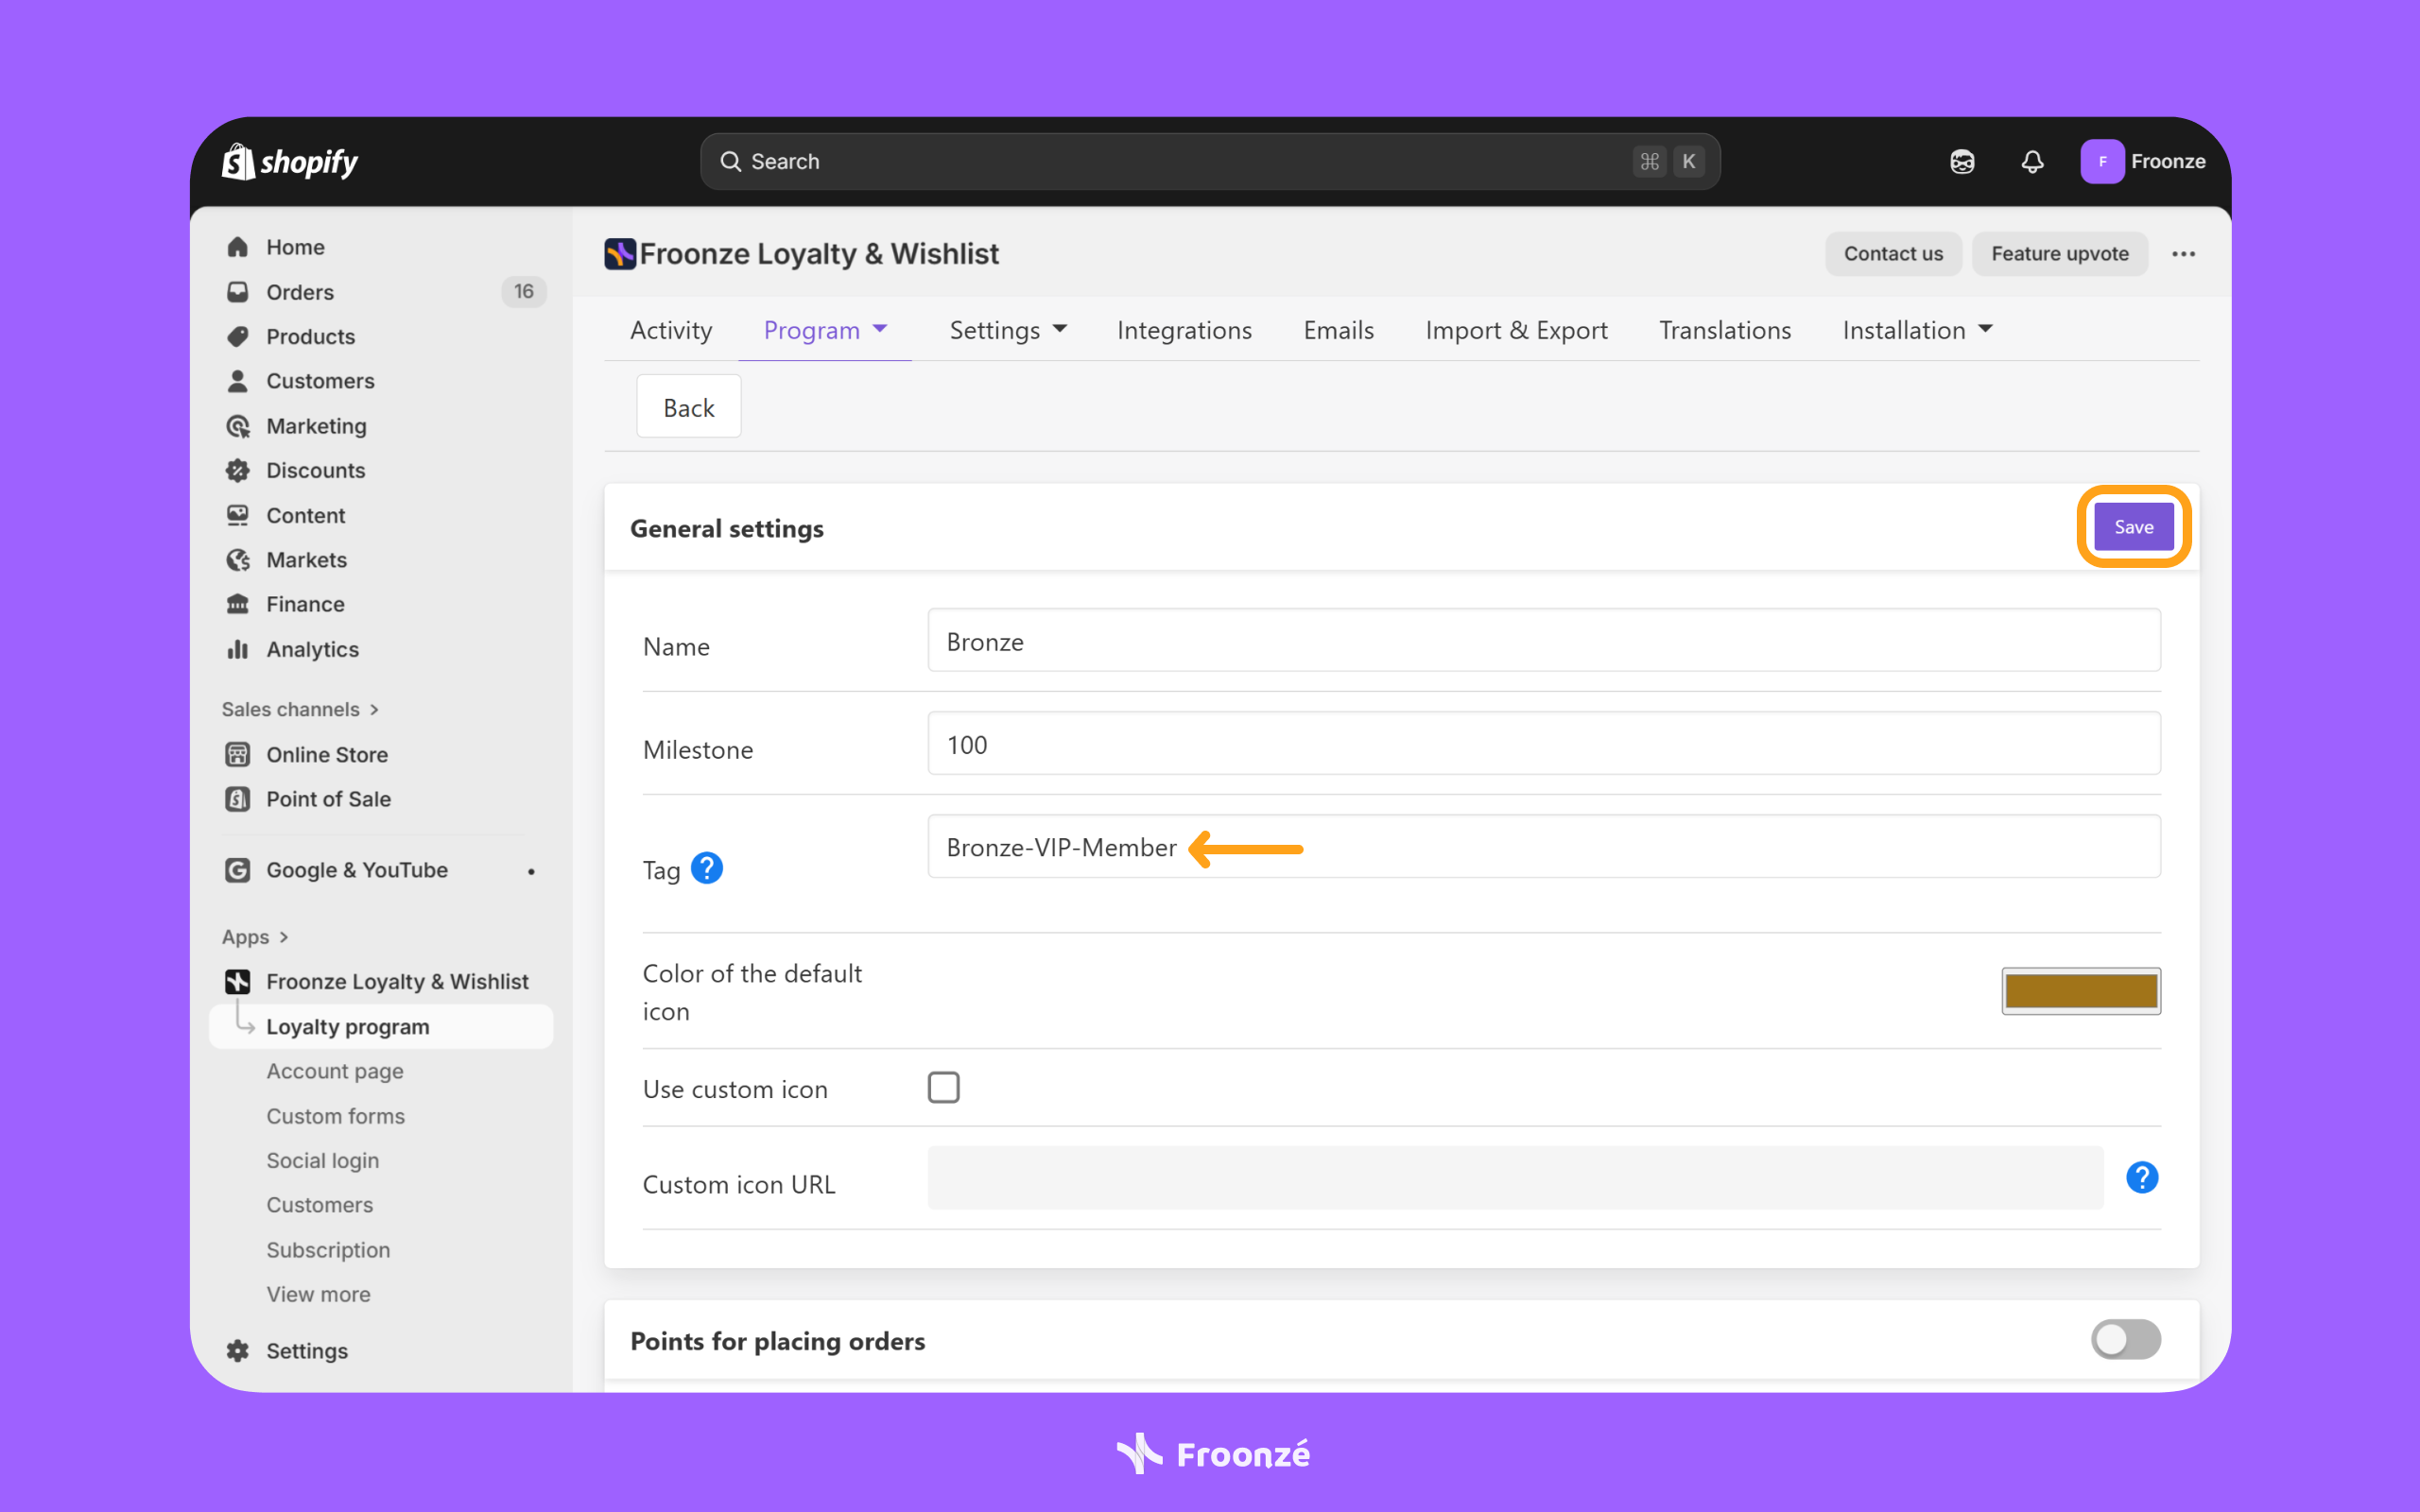
To kickstart the ongoing discounts for your VIP members, you’ll need to first add a customer tag value to each VIP tier you created.
To do so, follow these steps:
- Navigate to our app’s Loyalty ➜ Program ➜ VIP tab, and access the desired tier by hitting the “Pencil icon” button.
- Find the “Tag” input under the “General settings” section.
- Add your desired value and hit the “Save” button that appears after adding the value.
After a customer enters a VIP tier that has an assigned tag, you can view it in the Shopify Admin ➜ Customers section by accessing any customer.
Create a Shopify customer segment based on VIP tags
We’ve previously written about how to create a customer segment based on tags. You can check that article and come back, or simply follow the steps below:
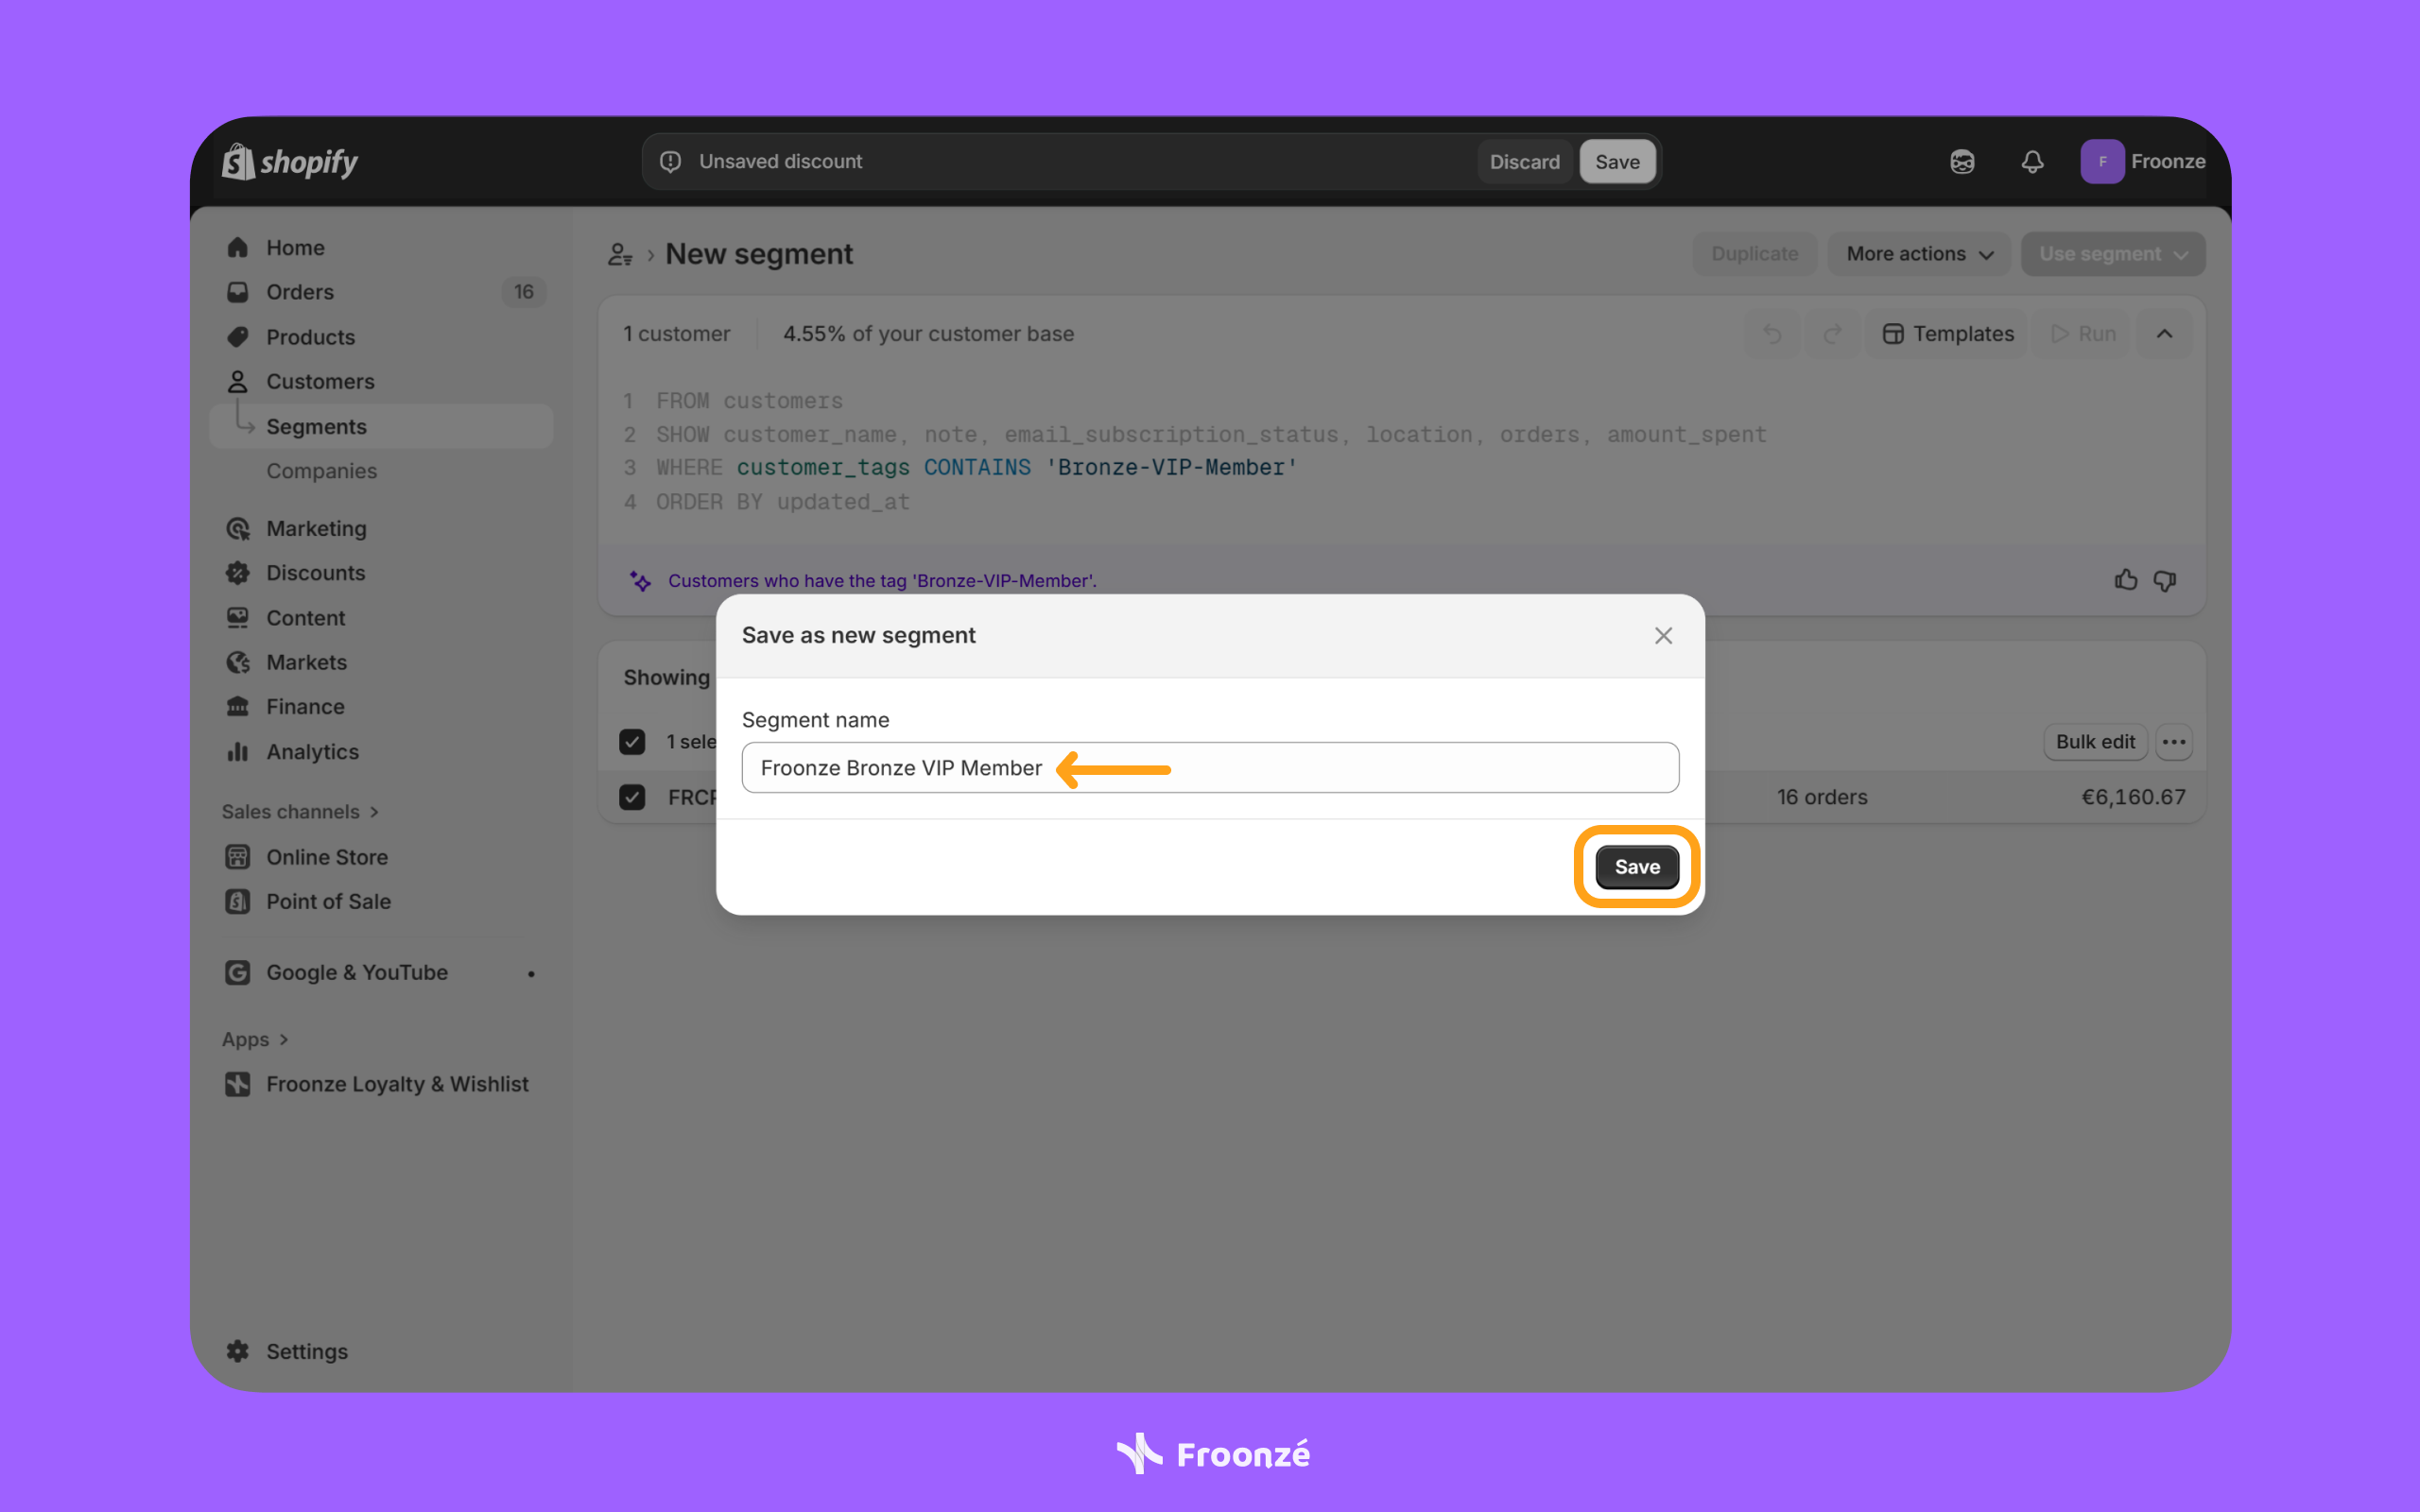
- Navigate to Shopify Admin ➜ Customers ➜ Segments ➜ Create segment to access the customer segment creation page.
- Add the following formula to the filters editor:
customer_tags CONTAINS ‘custom_tag’
Remember to replace ‘custom_tag’ with the value of the tag you added to your VIP tier. - Once happy with the filters, hit the “Run query” option.
- Once redirected to the page with all customers who have the specified tag, hit the “Save” button at the top.
- Give the segment a name when prompted by the pop-up window and hit the “Save” button one last time.
With the new VIP tag-based customer segment created, the next step is to create an ongoing discount.
Create a Shopify discount for the VIP customer segments
Store owners can create 4 types of Shopify discounts:
- Amount off products
- Buy X, get Y
- Amount off order
- Free shipping
The focus is not so much on which discount type to create (they’re self-explanatory), but how to configure each method for the customer segment we set up earlier. For the sake of example, we’ll default to an “Amount off order” discount.
In both cases, you’ll want to follow these instructions to create the discount:
- Navigate to Shopify Admin ➜ Discounts ➜ Create discount to access the discount creation pop-up.
- Select the desired discount type. We’ll go with the “Amount off order” discount, for the sake of example, as explained earlier.
- Once selected, you will be redirected to the discount creation page.
Once in the discount creation page, you can choose from 2 pre-existing discount methods:
- Discount code
- Automatic discount
The major difference between the discount methods is how they are applied in the cart and during checkout.
Differences in Shopify discount methods
Before configuring the desired discount method, there are certain crucial differences between the two that you should take stock of.
Discounts using the “Discount code” option need to be applied manually by customers, either to the cart or during checkout, while discounts using the “Automatic discount” option will be applied automatically in the cart and during checkout.
So, in both cases, you’ll need to let customers know how the discount works. That's where VIP perks come in, but more on that a bit later.
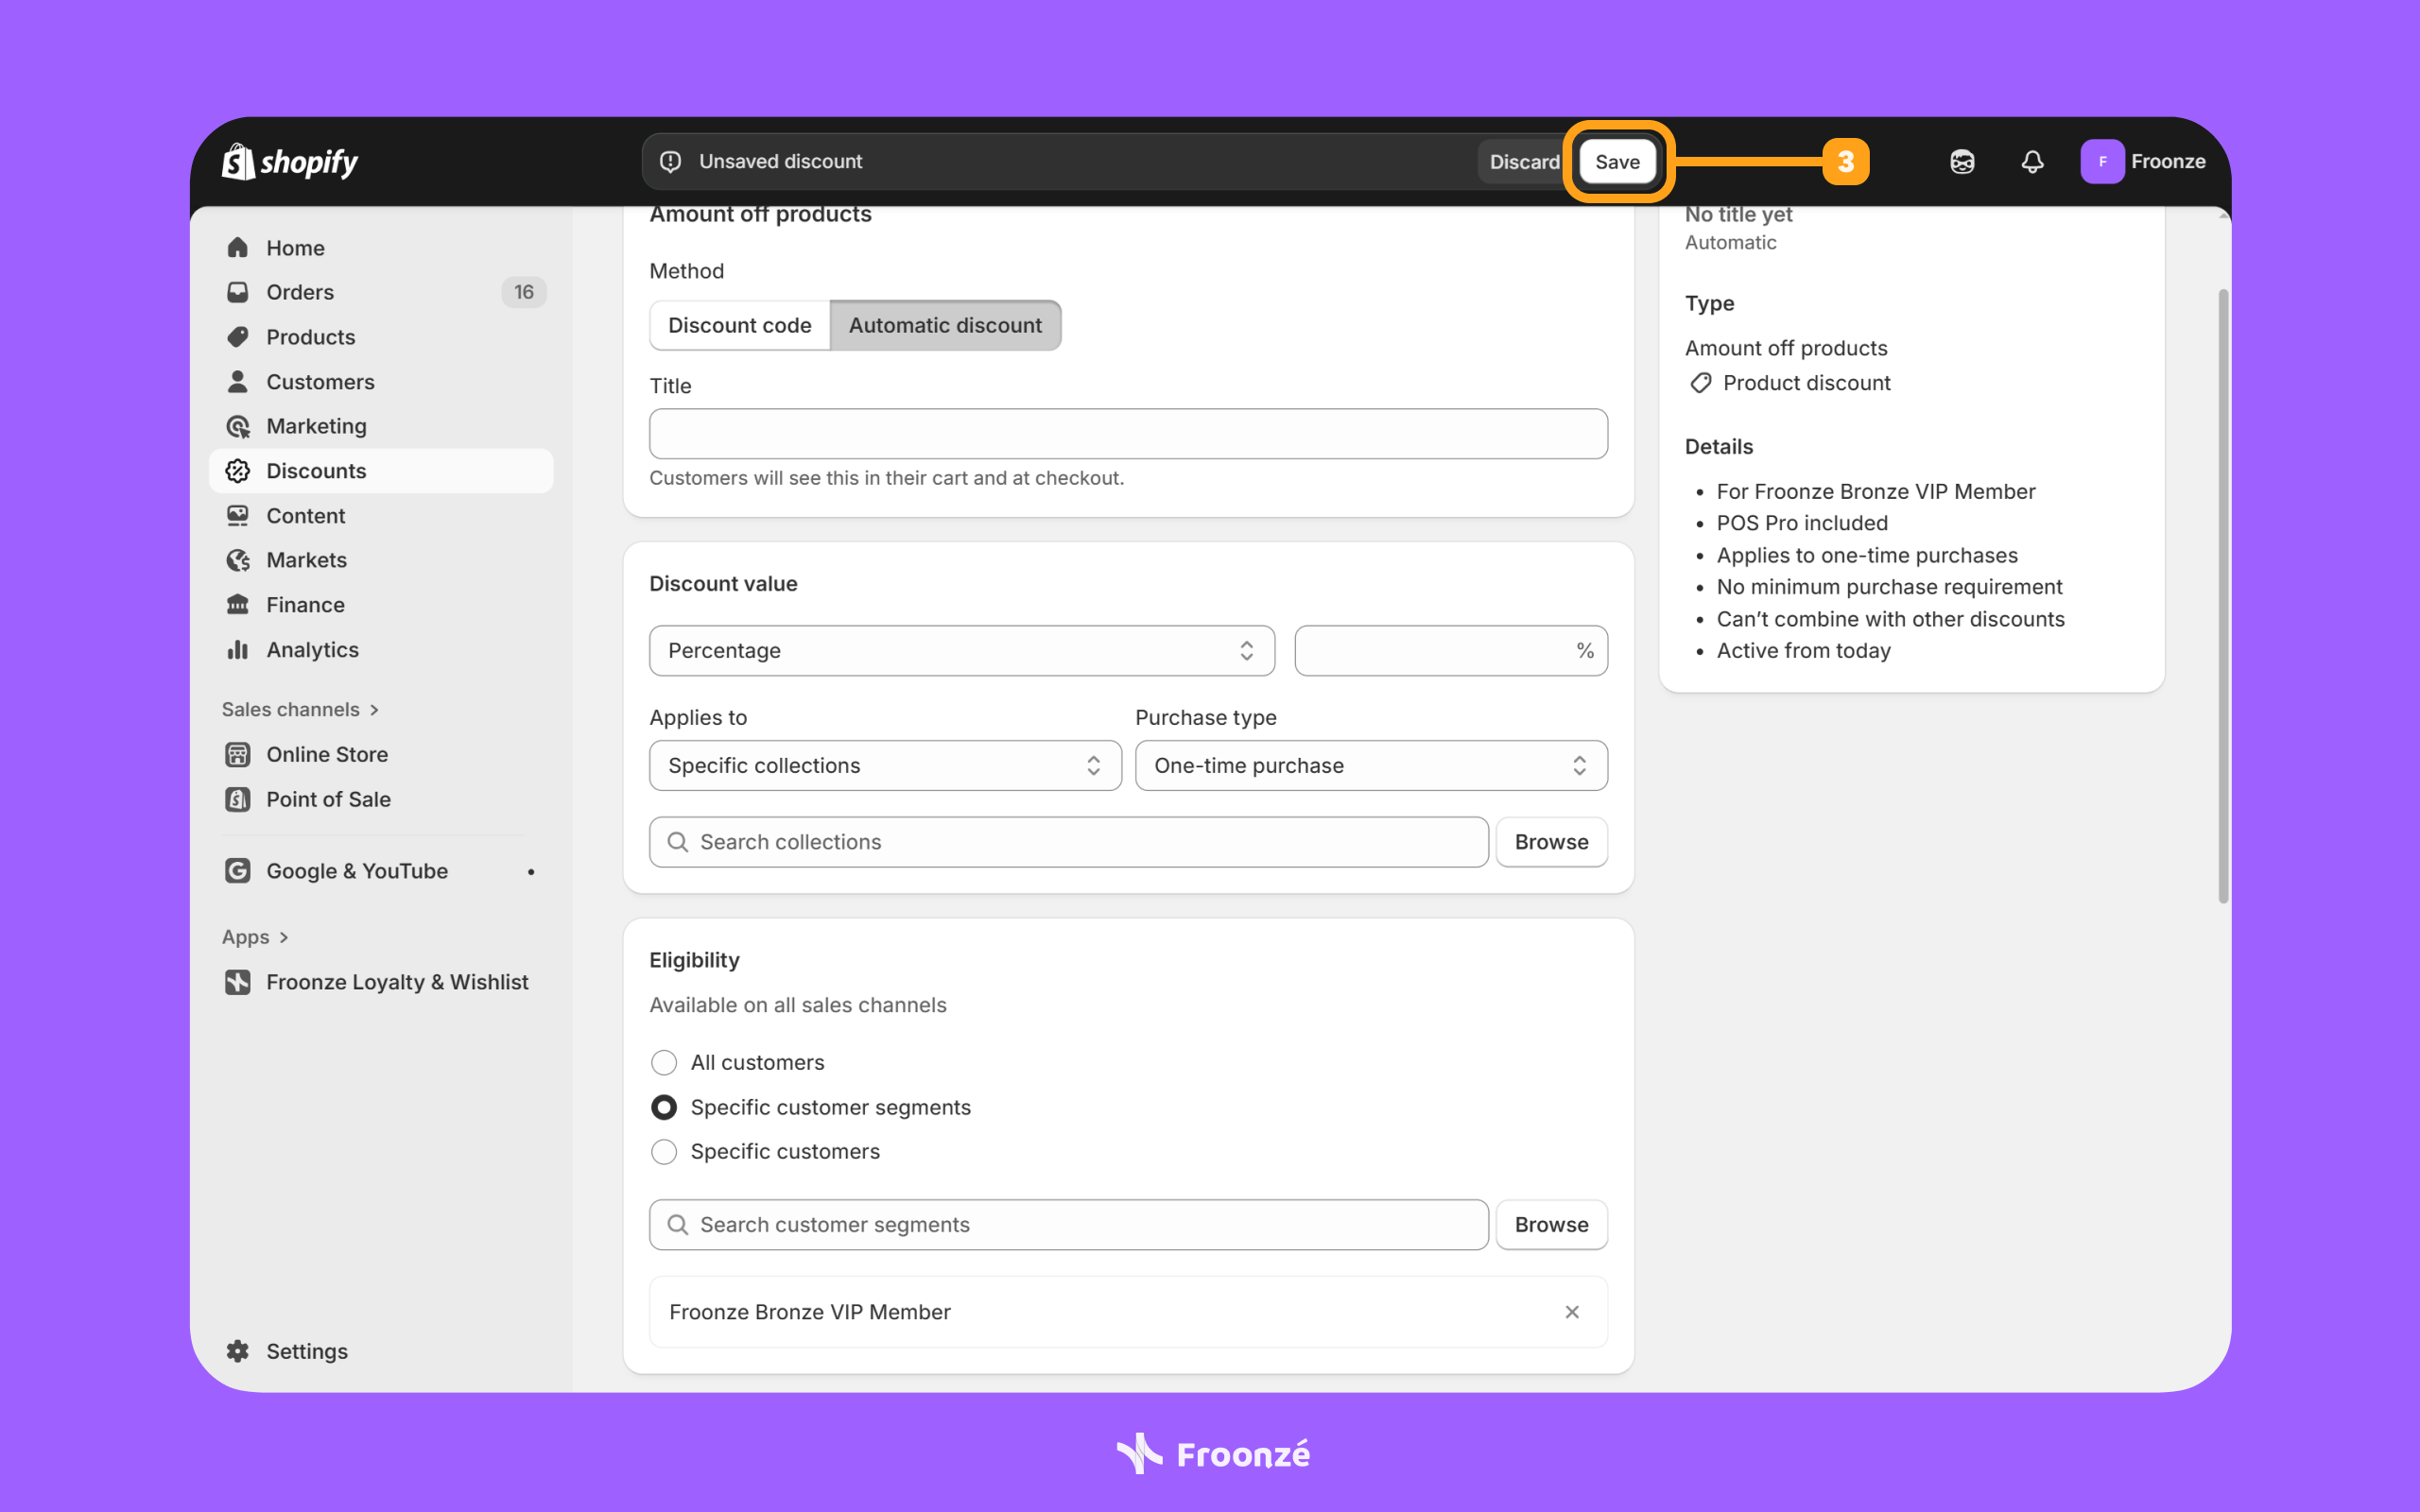
Configure the Shopify discount method
Configuring and saving the Shopify discount your VIP members are about to enjoy is straightforward. Just follow these steps:
- Select either the “Discount code” or “Automatic discount” option from under the “Method” section.
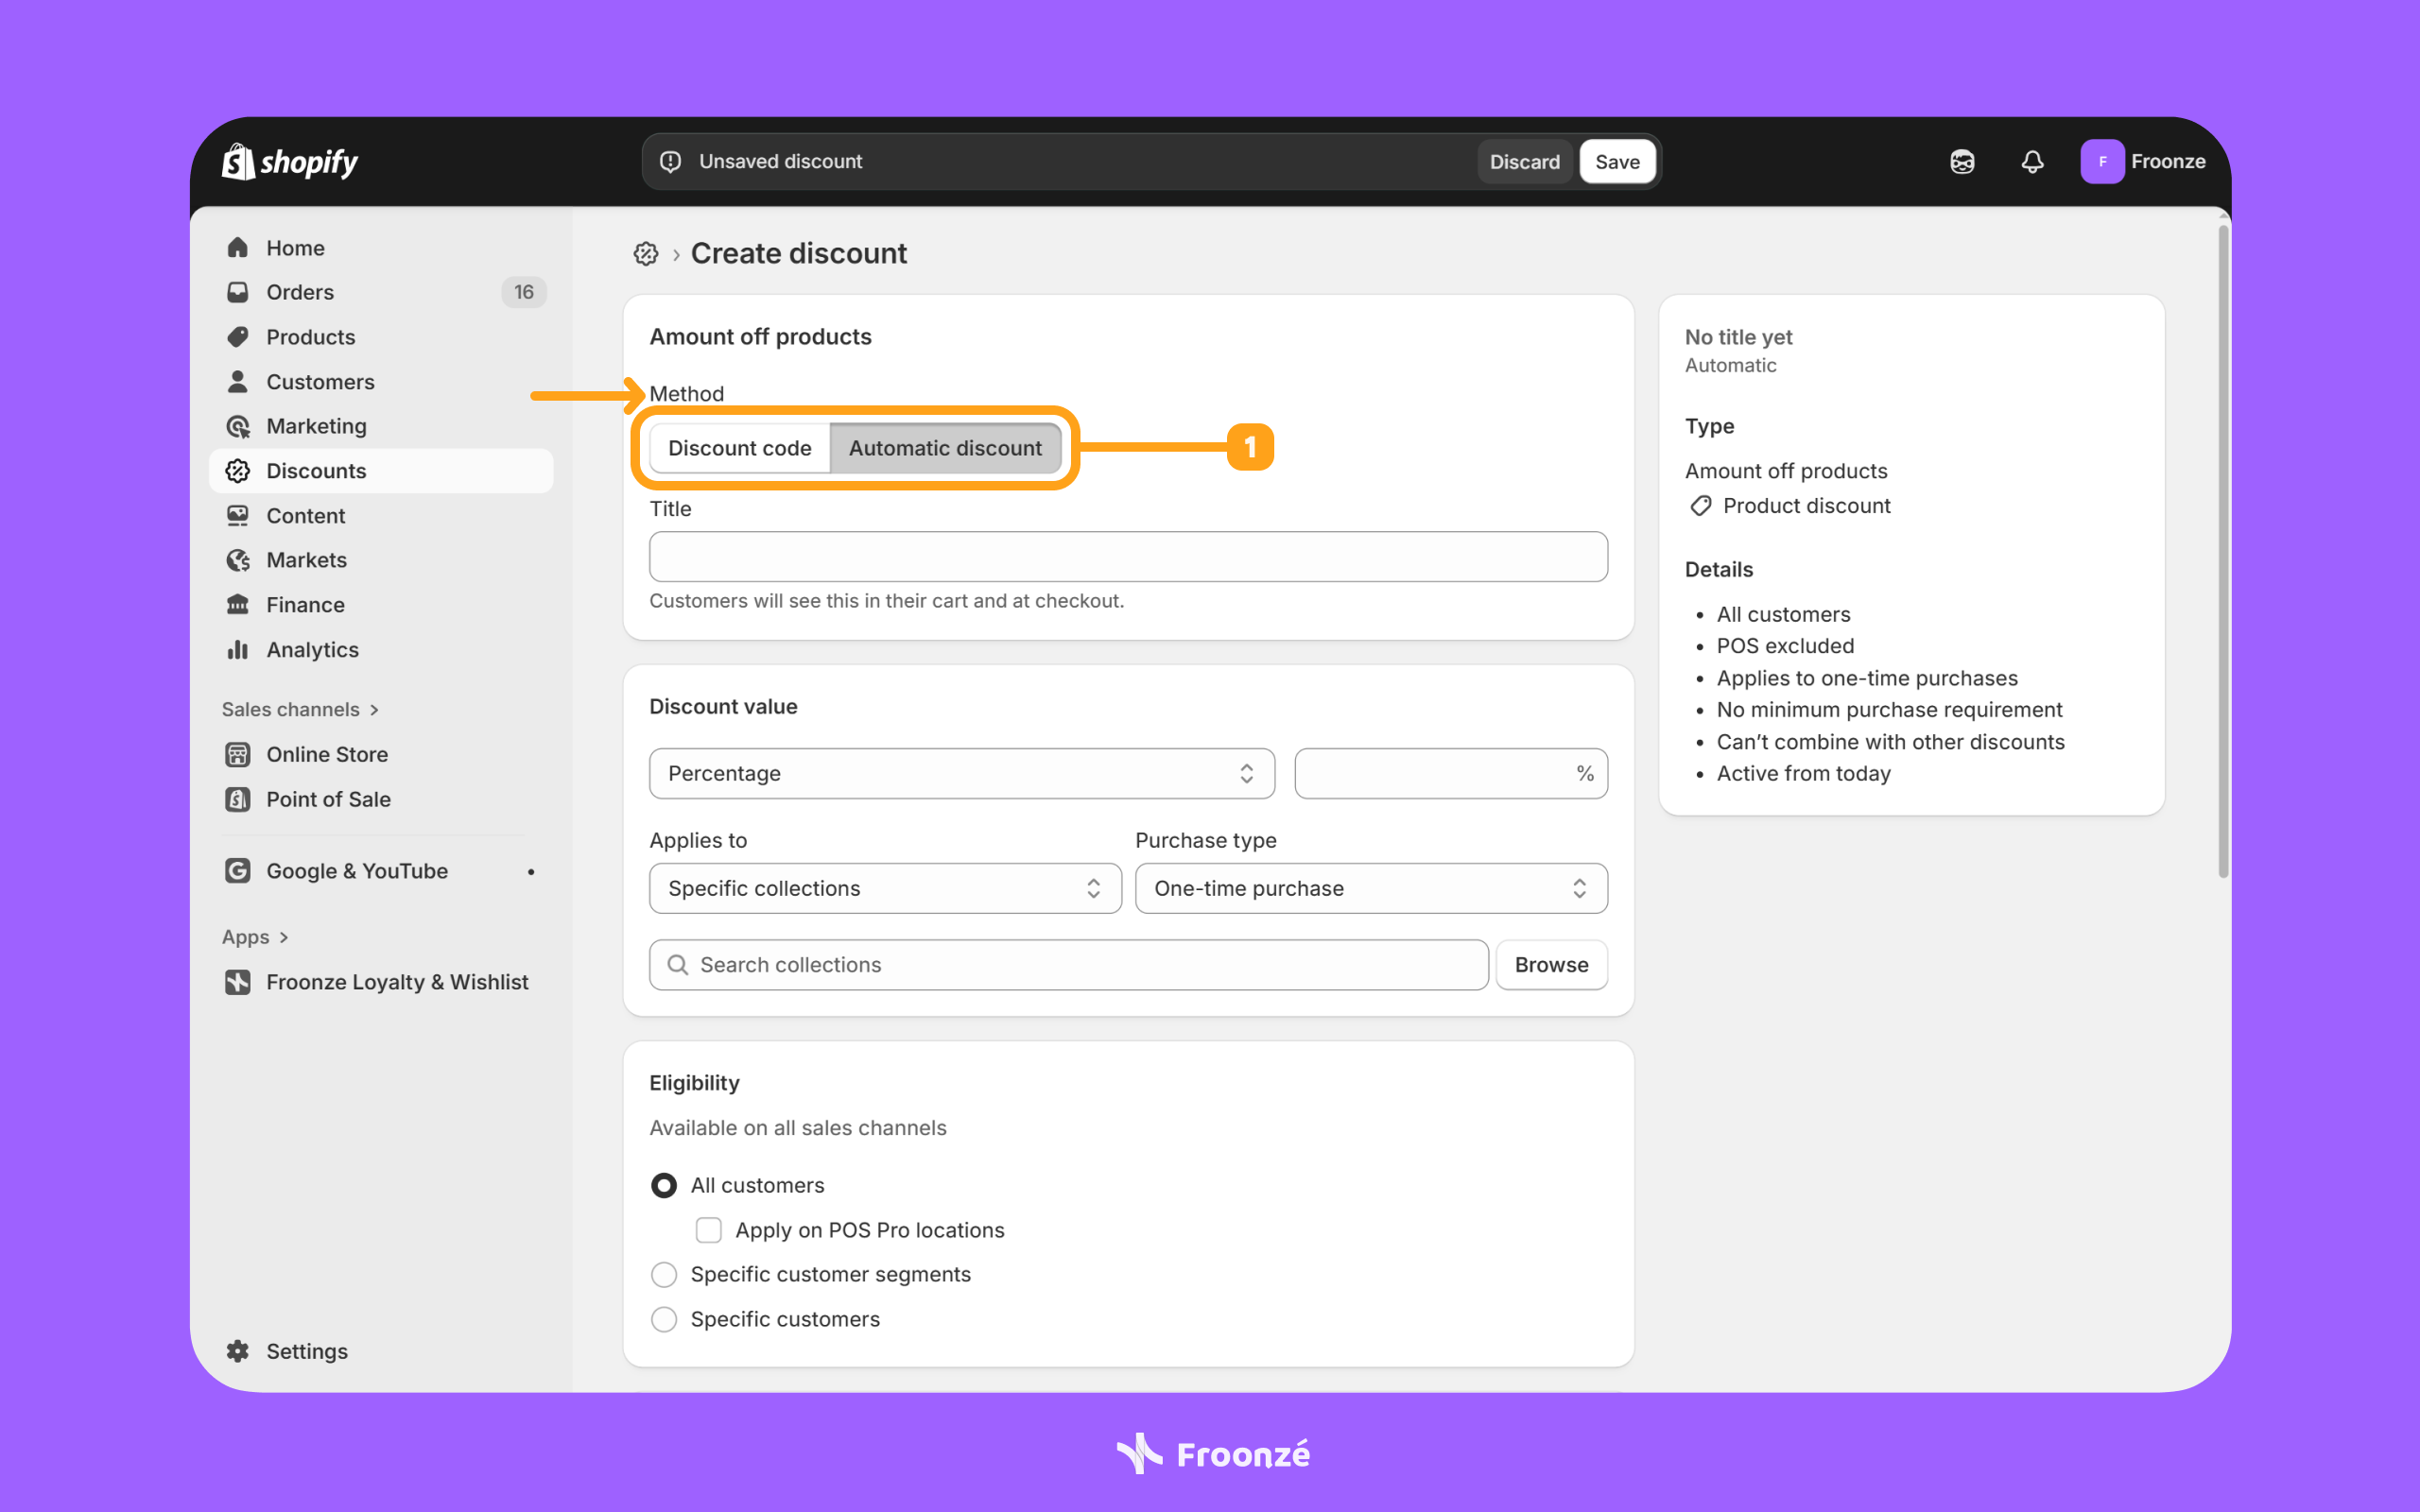
- Select “Specific customer segments” from under the “Eligibility” section.
- Search the customer segment you created for the VIP tier in the previous steps.
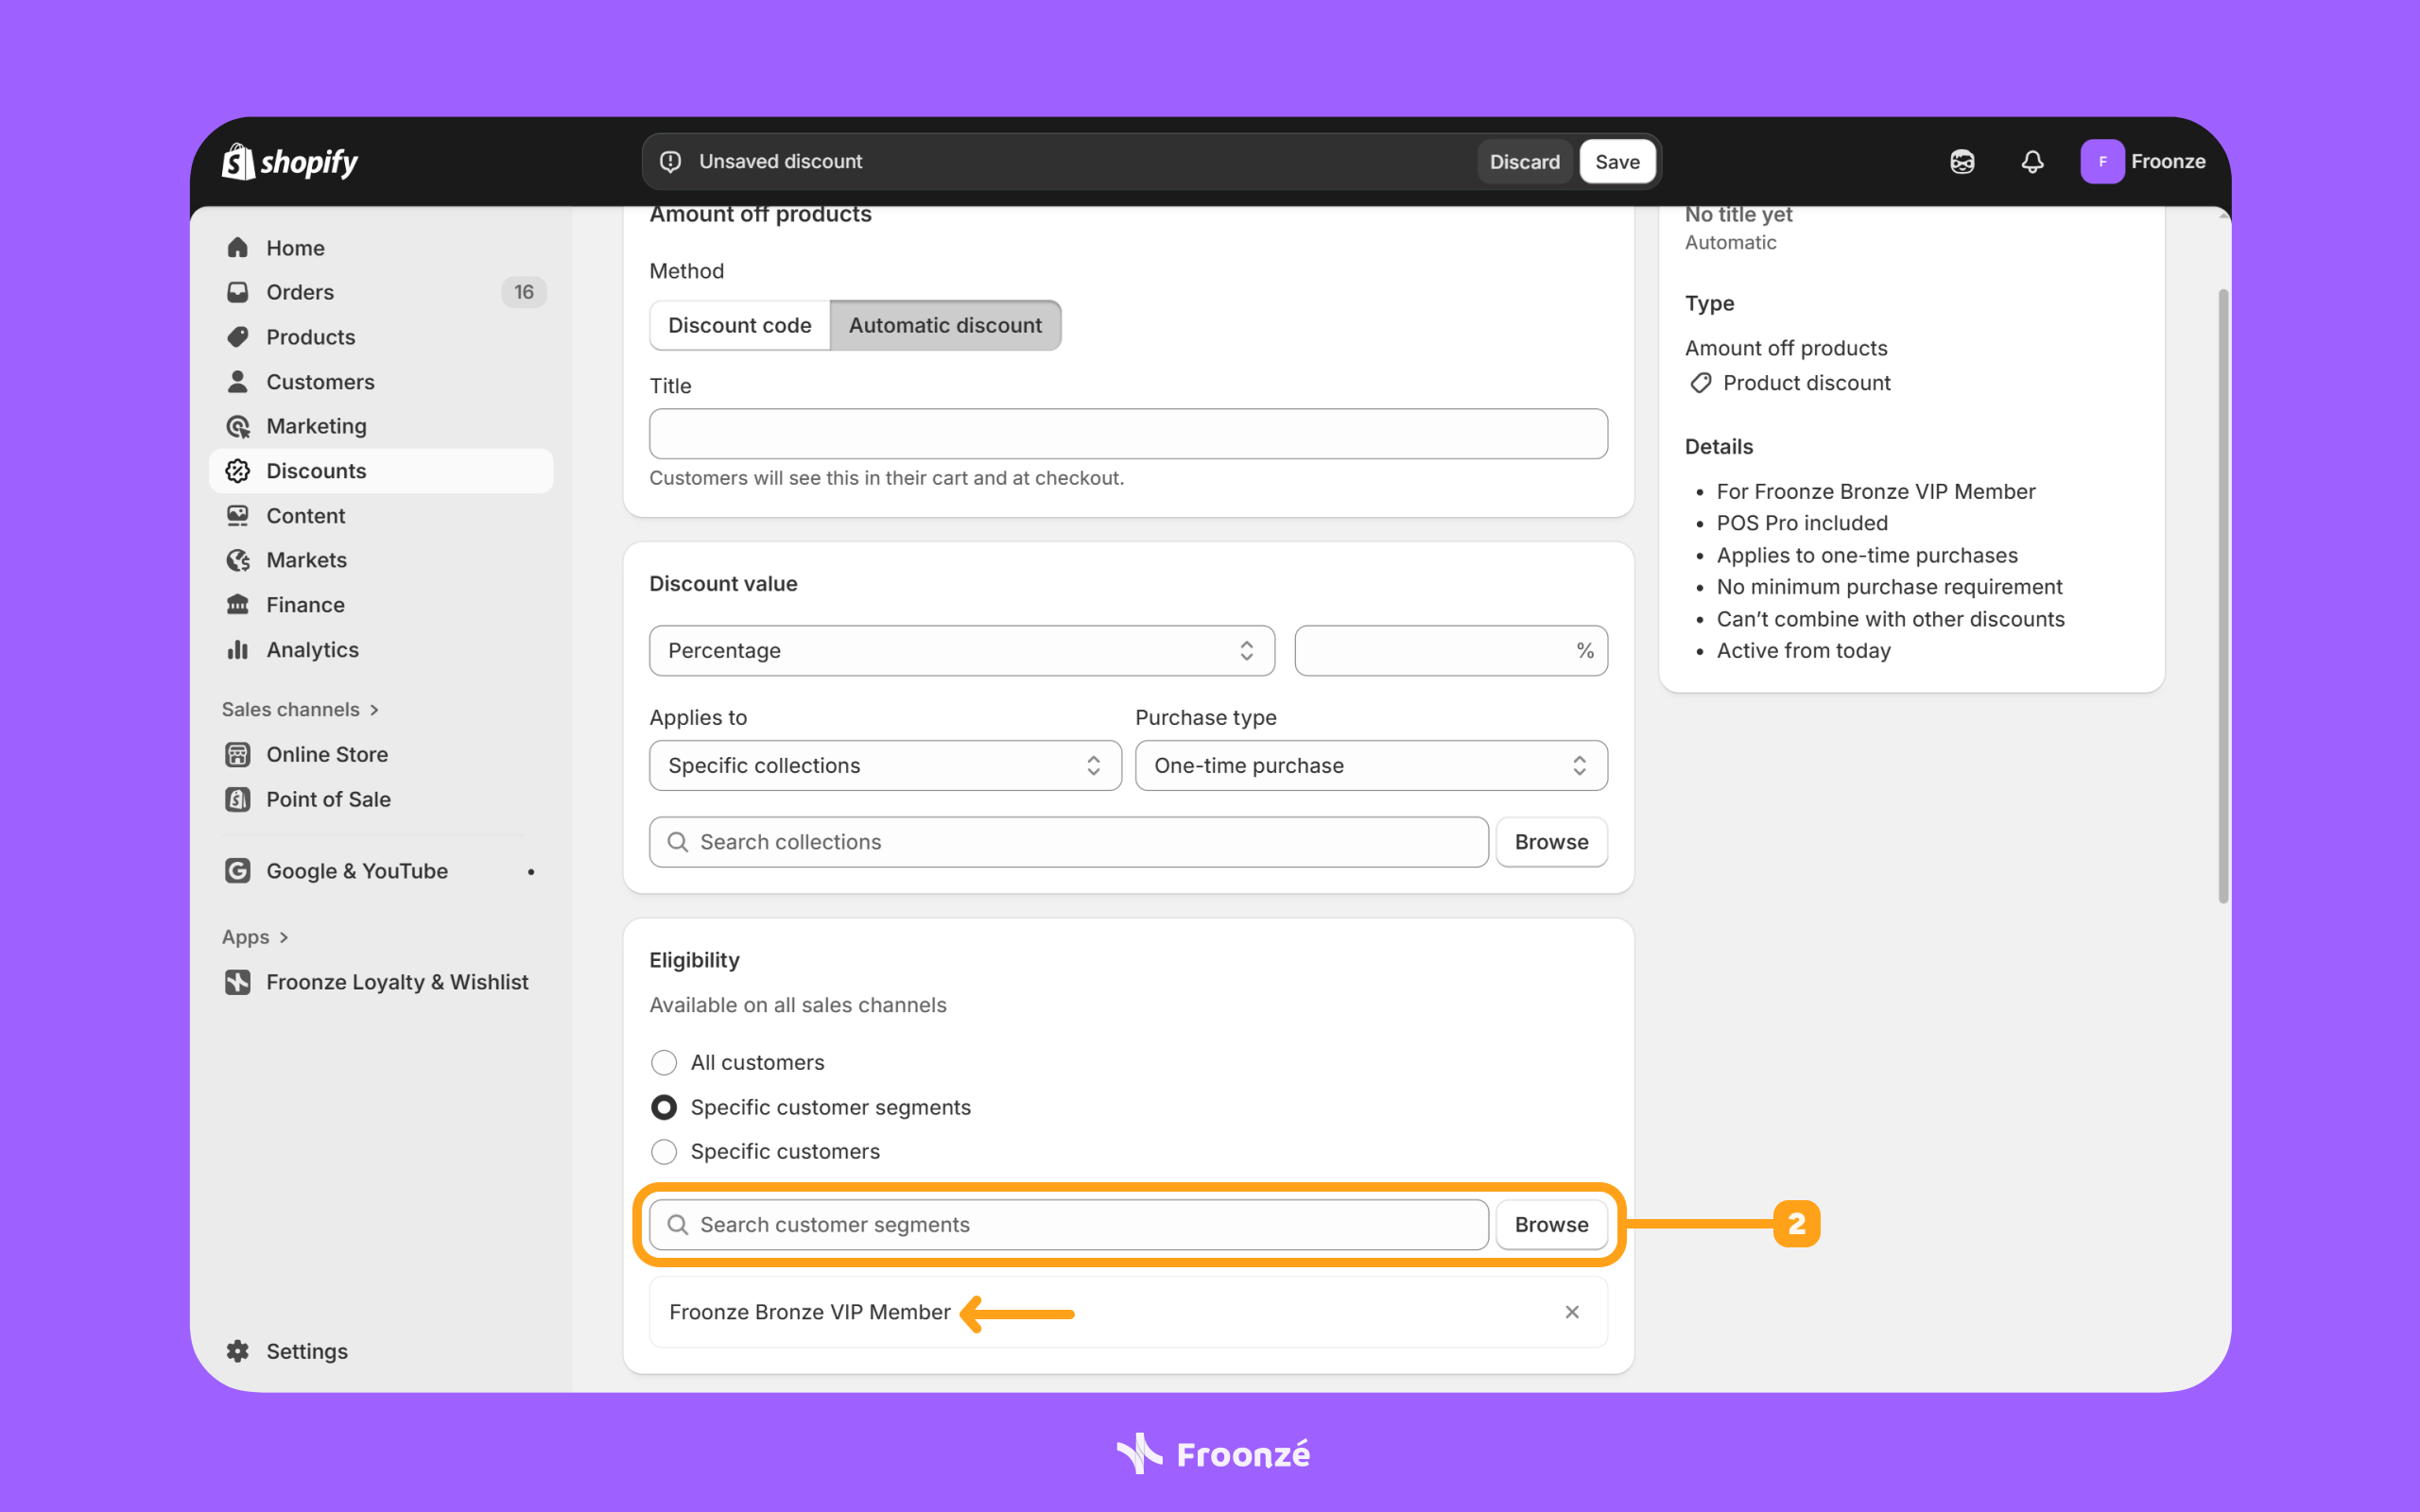
- Fill in the other fields for the discount, such as the type and value of the discount, whether the discount can be combined with other discounts, if there should be a minimum purchase requirement, and so forth.
- For automatic discounts, you can also set up a descriptive title (e.g. BRONZE 10% OFF).
- For discount codes, you can fill in a descriptive discount code (e.g. BRONZE10OFF).
- Once everything is set accordingly, hit the “Save” button.
Now, depending on the discount method used, customers will either see the discount applied automatically, as is the case with the “Automatic discount” method. Or they will have to apply it themselves, as is the case with the “Discount code” method.
Inform VIP members about the ongoing discount perks
With everything in place, the only thing left is to inform your VIP members about the ongoing discount they’ll now benefit from.
The easiest way to do that is by adding a VIP tier perk. You can do so by following these steps:
- Navigate to our app’s Loyalty ➜ Program ➜ VIP tab, and access the desired tier by hitting the “Pencil icon” button.
- Scroll to the “Perks” section and hit the “Add” button.
- Type a “suggestive name” (that describes the discount value, type, and method) and hit the “Save” button.

For more information about perks, take a look at our VIP program setup guide.
Create ongoing discounts for VIP members with Froonze
You’ve seen how easy it is to reward your loyal customers through our VIP program’s auto-tagging feature. We recommend that you give our Froonze app a try if you haven’t already. If it’s your first time installing the app, you’ll benefit from a 14-day free trial!